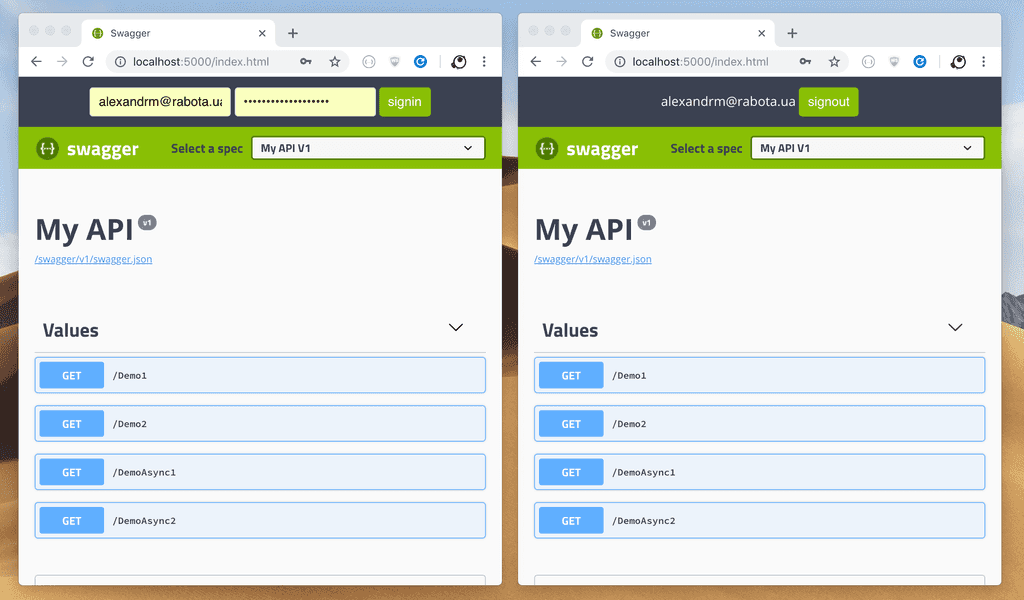
Dotnet Core Swashbuckle 3 Bearer Auth
Suppose you have your API already, it is requires bearer jwt auth and you already added and configured swashbuckle.
From dotnet point of view you gonna need configure services to have JWT bearer authentication something like:
services.AddAuthentication(JwtBearerDefaults.AuthenticationScheme)
    .AddJwtBearer(options =>
    {
        options.TokenValidationParameters = new TokenValidationParameters
        {
            ValidateIssuer = false,
            ValidateAudience = false,
            ValidateLifetime = true,
            IssuerSigningKey = new SymmetricSecurityKey(Encoding.UTF8.GetBytes(
                "PASSPHRASE_TO_ENSURE_GIVEN_JWT_IS_SIGNED_BY_YOUR_AUTH_SERVER"
            ))
        };
    });
Code above is just for demo purposes, in real world you should validate everything and use something like JWKS) instead of knowing secret.
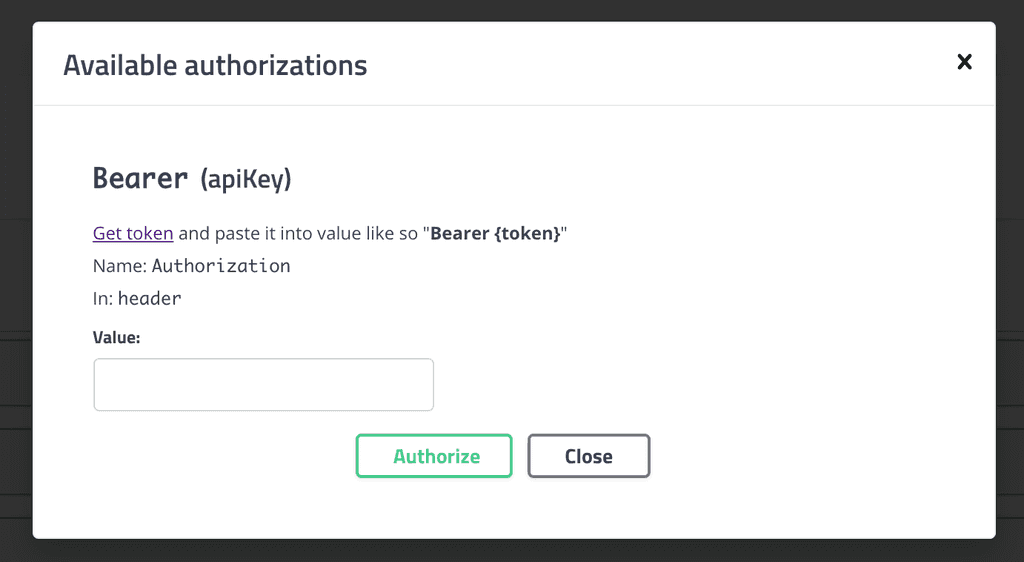
The problem with new swagger ui 3 is that it has limited auth capabilities
e.g. you gonna need to go to your auth server, authenticate there, grab your token, paste it here, and whenever you refresh window with swagger - start over :(
Customize Swagger UI 3
The right way will be to inject into react redux internals of swagger ui 3 but it is hard to achive, so we are going to do it in easier way by customizing index.html
There is two ways you can use this file:
Embed into assembly
pros - configuration from server side
cons - every change requires recompile
Save index.html in root directory of your project (e.g. side by side with Startup.cs)
In your csproj file:
<ItemGroup>
  <None Remove="index.html" />
  <EmbeddedResource Include="index.html" />
</ItemGrop>
Which will embed file into assembly, then in Startup:
app.UseSwaggerUI(c =>
{
    c.SwaggerEndpoint("/swagger/v1/swagger.json", "My API V1");

    var assembly = GetType().GetTypeInfo().Assembly;
    var ns = assembly.GetName().Name;
    c.IndexStream = () => assembly.GetManifestResourceStream($"{ns}.index.html");
});
Which will override standard index.html with one you have provided.
Notice that you need to prepend embeded file name with your assembly namespace prefix.
Static file
pros - does not require compilation for changes to take effect
cons - configuration hand coded
Just save index.html to wwwroot and add static and default files to your Startup.cs like so:
public void Configure(IApplicationBuilder app, IHostingEnvironment env)
{
    app.UseStaticFiles();
    app.UseDefaultFiles();
    // ...
}
Few things left for this file to work:
Replace paths for script sources from relative to absolute, e.g. from ./swagger-ui-bundle.js to /swagger/swagger-ui-bundle.js.
Replace %(DocumentTitle) with whatever you want.
Remove %(HeadContent).
Replace JSON.parse('%(ConfigObject)') with something like: {"urls":[{"url":"/swagger/v1/swagger.json","name":"My API V1"}],"validatorUrl":null}, make sure to change url to your swagger.json if needed.
Replace JSON.parse('%(OAuthConfigObject)') with {}.
You can look for all this stuf from file generated by deafult by opening your http://localhost:5000/swagger/index.html.
Custom auth
Now, when we have our file in place we are going to hook inside swagger ui and make our own bearer auth.
First of all we need some styles (somewhere in head tag):
.swagger-ui.swagger-container .topbar.rua {
  background: #3b4151;
  text-align: center;
  color: white;
}

.swagger-ui.swagger-container .topbar.rua input[type='submit'] {
  margin: 5px 0;
  padding: 8px 10px;
  border: 1px solid #89bf04;
  border-radius: 4px;
  background: #89bf04;
  color: white;
}
And markup (right above <div id="swagger-ui"></div>):
<div class="swagger-ui swagger-container">
  <div class="topbar rua">
    <div class="wrapper">
      <form id="signin" hidden>
        <input id="username" type="email" placeholder="[email protected]" pattern="[email protected]" required />
        <input id="password" type="password" placeholder="*********" required />
        <input type="submit" value="signin" />
      </form>
      <form id="signout" hidden>
        <span id="hello"></span>
        <input type="submit" value="signout" />
      </form>
    </div>
  </div>
</div>
Do not forget to change username pattern
Now all is left is to wireup everything, we are going to change configObject and add some new properties:
var configObject = {
  urls: [{ url: '/swagger/v1/swagger.json', name: 'My API V1' }],
  validatorUrl: null,
  dom_id: '#swagger-ui',
  presets: [SwaggerUIBundle.presets.apis, SwaggerUIStandalonePreset],
  layout: 'StandaloneLayout',
  requestInterceptor: (req) => {
    const token = localStorage.getItem('token')
    if (token) {
      req.headers.authorization = `Bearer ${token}`
    }
    return req
  },

  onComplete: () => {
    const signin = document.getElementById('signin')
    const signout = document.getElementById('signout')
    const hello = document.getElementById('hello')

    const update = () => {
      const token = localStorage.getItem('token')

      if (token) {
        const { email } = JSON.parse(window.atob(token.split('.').splice(1, 1).shift().replace('-', '+').replace('_', '/')))
        hello.innerText = email
        signin.hidden = true
        signout.hidden = false
      } else {
        signin.hidden = false
        signout.hidden = true
      }
    }

    signin.addEventListener('submit', (event) => {
      event.preventDefault()
      const options = {
        method: 'POST',
        headers: {
          'Content-Type': 'application/json'
        },
        body: JSON.stringify({
          username: document.getElementById('username').value,
          password: document.getElementById('password').value
        })
      }

      fetch('https://account.contoso.com/token', options)
        .then((res) => res.text())
        .then((token) => localStorage.setItem('token', token))
        .then(update)
    })

    signout.addEventListener('submit', (event) => {
      event.preventDefault()
      localStorage.removeItem('token')
      update()
    })

    update()
  }
}
More details might be found here
We have added requestInterceptor which will inject bearer token if any to requests being send to server.
Also we added onComplete which add event listeners to our forms, and performs UI update, nothing fancy here, but be sure to take a closer look at sign in handler and modify it for your needs.

